It’s happened to all of us at some point. You’re out on a ride, everything is going great, and then suddenly your chain pops off. Maybe you were shifting gears and didn’t realize the chain had come off, or maybe you hit a bump in the road. Either way, now you’re stuck with a chain that’s not attached to your bike. Don’t worry, though. Putting the chain back on is pretty easy, and it doesn’t take long. Here’s a step-by-step guide on how to do it.
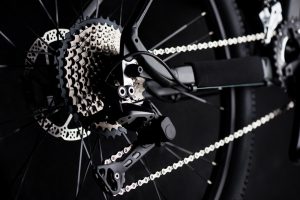
You might think that your bike chain and derailleur are the same, but they’re two separate components with separate jobs. Let’s take a closer look at what each does—and how they work together to help you ride. Your bike chain is responsible for transmitting power from your pedals to your drivetrain. It’s a metal chain that connects your crankset (the part of the bike that connects the pedals to the bike frame) to the rear cassette (the cluster of gears on the back wheel). The derailleur, on the other hand, is a mechanism that helps change gears. It consists of a body, two pulleys, and a lever. When you shift gears, the derailleur moves the chain from one sprocket to another.
What Is a bike chain?
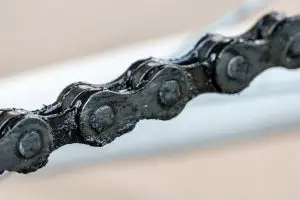
Your bike chain is one of the most important pieces of your bicycle. It’s what connects your pedals to the wheels, and it’s what makes it possible for you to move.
That’s why it’s important to make sure that your chain is in good condition. If it’s dirty, oily, or rusty, it can cause your derailleur to malfunction. Your derailleur is responsible for shifting the chain between the different gears on your bike, so if it’s not working properly, you’ll have a hard time getting anywhere.
What Is a derailleur?
A derailleur is a bike part that helps shift your bike gears. It’s a metal cage that holds the chain, and your derailleur’s job is to move the chain from one gear to another. There are two main types of derailleurs: front and rear. The front derailleur moves the chain between the smaller gears on the front of the bike, while the rear derailleur moves the chain between the larger gears on the back of the bike.
Simple overview
First, you’ll need to find the chain. Likely, it’s still on the bike somewhere, but it might have fallen off completely. If it’s not on the bike, look on the ground around where you were riding. Once you find the chain, hold it in one hand and the derailleur in the other. The derailleur is the part of the bike that moves the chain from one gear to the next. Push the derailleur back into place. You’ll know it’s in the right spot when you feel it click into place.
Take the chain and put it back on the gears. Start with the gear that’s farthest from the pedals and work your way up. Once the chain is back on the gears, pull it tight and make sure it’s not too loose. You don’t want it to come off again while you’re riding. And that’s it! You’re now ready to keep riding. Just remember to be careful when shifting gears, and always check that the chain is tight before you start pedaling.
The relationship between bike chains and derailleurs
Your bike chain and derailleur are two very important parts of your bicycle. The derailleur is responsible for moving the chain between the different gears on the cassette, while the chain is responsible for transferring the power from the pedals to the rear wheel. Both of these parts must be maintained and kept in good condition. If your chain is too loose, it can come off the derailleur; if it’s too tight, it can wear down the derailleur and cause problems shifting gears. The best way to maintain your bike chain and derailleur is to keep them both clean and well-lubed. You can do this by wiping them down with a rag after each ride and applying a light coat of lubricant every few weeks.
How to clean and maintain your bike chain
Cleaning and maintaining your bike chain is important to keeping your bike in good condition and preventing damage. You should clean your bike chain regularly, about once a month or so. You can use a brush or a cloth to remove debris and then apply a lubricant. It’s important to use the right kind of lubricant, one that’s designed for bike chains. You don’t want to use something like WD-40, which will just attract more dirt and grime.
When you’re applying the lubricant, be sure to get it on all the moving parts of the chain, including the rollers and pins. You can use a rag to wipe off any excess lubricant. If you live in an area with lots of dust or dirt, you may need to clean and lubricate your chain more often.
When to replace your bike chain
You’ll know it’s time to replace your bike chain when you start to hear a creaking noise, or if the chain starts to skip while you’re pedaling. These are both signs that the chain is stretched and needs to be replaced. If you don’t replace your bike chain, eventually it will snap, and then you’ll have a big mess on your hands (not to mention, a big repair bill). So it’s always better to be proactive and replace your bike chain before it gets to that point.
When you do replace your bike chain, make sure you also replace the cassette (the gears on the back wheel) and the chainrings (the gears on the front crank). This will ensure that everything is working together smoothly and properly. Clean your bike chain regularly. It is a good idea to clean your bike chain once every month or so, even if you are not riding it. This helps keep the lubricant fresh and prevents rusting of the chain and other parts of the bike.
Troubleshooting tips for bike chains and derailleurs
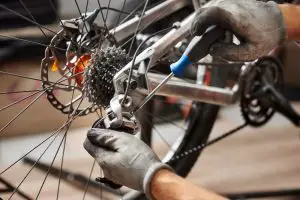
If you’re having issues with your bike chain, your derailleur likely is to blame. The derailleur is the component that moves the chain from one cog to another, and if it’s not working properly, the chain can slip off. There are a few things you can do to troubleshoot this problem. First, check to see if the derailleur is properly aligned. If it’s not, you can try adjusting it yourself or take it to a bike shop to have a professional take a look.
Another thing to check is the limit screws. These screws are what prevent the chain from falling off the cogs, so if they’re not tightened properly, the chain can slip. Again, you can try adjusting them yourself or take your bike to a shop for help. Finally, make sure that the corset is compatible with your chain. If it’s not, you’ll need to get a new one. This is something you should take to a bike shop, as they’ll be able to help you find the right corset for your bike.
Detailed process
It’s amazing how many people never learn how to properly adjust their bike chains. It’s one of those things that’s just so simple, and yet so vital to the proper functioning of your bike. Not to mention, it’s one of those things that can be dangerous if not done correctly. Chain back, derailleur, or whatever you want to call it, is the process of moving the chain from the big ring to the small ring (or vice versa). It’s not that difficult, but there are a few things you need to know to do it safely. First, if you have a chain that’s too long, it can get caught in the derailleur and cause all kinds of problems. Not to mention, it’s just plain dangerous. So, before you even attempt to chain back, make sure that your chain is the correct length.
If you don’t have a chain checker, you can always just count the links. Most chains have between 60 and 66 links. If yours is different, you may need to get a new chain. Once you’ve confirmed that your chain is the correct length, you can proceed with the actual process of chaining back. First, you’ll need to shift into the smallest cog on your cassette. Next, you’ll need to remove the chain from the big ring. To do this, you’ll need to push the derailleur away from the frame with one hand, while holding onto the chain with the other. Once the chain is off the big ring, you can let go of the derailleur and let it spring back into place.
Now, you’ll need to thread the chain through the derailleur. To do this, you’ll need to push the derailleur away from the frame with one hand, while holding onto the chain with the other. Once the chain is through the derailleur, you can let go of the derailleur and let it spring back into place. Now, you’ll need to put the chain back on the big ring. To do this, you’ll need to push the derailleur towards the frame with one hand, while holding onto the chain with the other. Once the chain is on the big ring, you can let go of the derailleur and let it spring back into place. And that’s it! You’ve successfully chained back! Just remember to always double-check your work, and never attempt to chain back if you’re not sure that your chain is the correct length.
A chain back or derailleur is a common cause of your bicycle chain falling off
The chain back is the small metal piece that connects the chain to the frame of the bike. It is located at the back of the bike near the rear wheel. The derailleur is the metal arm that moves the chain from one gear to another. It is located near the pedals.
There are a few reasons why your chain may fall off from the derailleur. The most common reason is that the chain is not properly aligned with the gears. If the chain is not aligned, it can slip off the gears and fall off. Another reason why your chain may fall off is that the derailleur is not properly adjusted. The derailleur should be adjusted so that the chain is tight when it is in the largest gear.
If your chain falls off, you should first check to see if the chain is properly aligned and adjusted. If it is not, you should take it to a bike shop to have it fixed. It is important that if your chain falls off and you can not find the cause, you should bring your bike to a bike shop. They will be able to help you find the cause and fix the problem.
Summary
Do you have a bike chain that has come off the derailleur? It can be a little tricky to put it back on, but with this guide, you’ll be a bike chain-fixing pro in no time! The first thing you’ll need to do is identify which side the chain came off on. If the chain came off on the drive side, you’ll need to remove the chain from the chainring. To do this, rotate the crank until the chainring teeth are facing upwards. Then, use your hand to push the chain off the teeth.
If the chain came off on the non-drive side, you don’t need to remove the chain from the chainring. Just skip to the next step. Once you’ve identified which side the chain came off on, it’s time to put it back on. If the chain came off on the drive side, thread the chain through the derailleur from the front to the back. Then, loop the chain around the chainring and thread it through the derailleur from the back to the front.
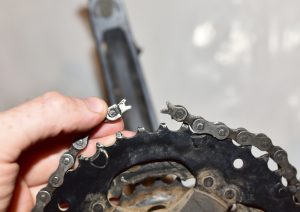
If the chain came off on the non-drive side, thread the chain through the derailleur from the back to the front. Then, loop the chain around the chainring and thread it through the derailleur from the front to the back. Once the chain is threaded through the derailleur, it’s time to reconnect the two ends. To do this, line up the rivets on the two ends of the chain and push them together. You may need to use a pair of needle-nose pliers to push the rivets together.
Conclusion
The bike chain is the part of the bicycle which connects with the rear wheel. The bike chain is a small metal link that connects to the rear wheel and is used for transferring power from the pedals to the wheels. The chain also helps in holding the gears, derailleurs, and brakes. It has two ends, one end connected to the crankset and another end connected to the sprocket on the rear wheel.
The chain is a part of the bike which works as a transmission. It is the most important component of your bike. The chain transfers power from the pedals to the wheel and vice versa. You will find that derailleur in every bicycle, but it’s not like they are interchangeable parts. The derailleur is an essential part of your bike and you need to be aware of its function before buying one for yourself or any other person who rides a bike. In conclusion, when it comes to your bike chain and derailleur, it’s important to keep them well-lubricated and clean. A dirty or dry chain can cause your bike to shift gears improperly, which can lead to a dangerous situation. By regularly cleaning and lubricating your chain, you can avoid these problems and keep your bike running smoothly.